Step by Step Guide On Tile Regrouting For DIY’s
Regrouting tile is a simple and cost effective way to restore your tired looking bathroom. You can regrout the tiles of the floor and walls to create a fresh look without relaying new tiles. You should immediately get to work and regrout the tiles if you see that it is damaged or is too old as this can cause major problems in the long run.
Follow these steps to regrout your tiles:
Step 1 – Select The Grout Colour
Purchase the appropriate grout color for the area you want to regrout. If you have decided to regrout an entire area of a room, then the color of the grout should match the color of the tile. On the other hand, if you want to regrout only a small part of a room, it is better if you see that the color of the new grout matches that of the old grout.
Step 2 – Remove The Old Grout

Step 3 – Clean The Tiles
After you have completely removed the grout, use a vacuum cleaner to clean the tiles of dirt or pieces of loose debris. Clean the tiles with a household cleaner or mixture of water and cleaning detergent.
Step 4 – Mix The Grout
Always check the manufacturer’s instructions first. If you are not using pre-mixed grout, mix the grout you have purchased. The most recommended type of grout is modified with latex. It is better because it is resistant to water, thus making it ideal for bathrooms or other wet areas.
Step 5 – Apply The Grout
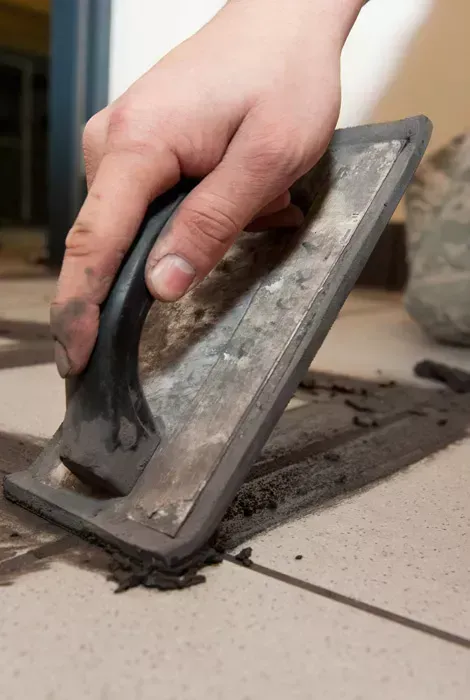
Use a float to place the grout on the tile and spread it diagonally over the area. Hold the float at an angle of 30-degrees and push the grout between the tiles. Be sure to distribute extra grout into the grout joints in order to fill them completely.
Note: The rubber grout float is a rectangular, flat tool with a steel handle and rubber surface used to distribute grout.
Step 6 – Remove Excess Grout and Clean The Tiles
Once you have finished filling the spaces with grout, use the float again to remove the excess grout from the tile floor once every grout joint has been filled. Do this by going over the tile with the rubber grout float, only this time use it at a sharp angle and move it diagonally across the tile floor in order to scrap the excess grouting material off. Let grout set for approximately 10 minutes or as long as recommended on the manufacturers packaging. Then use a damp tile sponge to remove the excess grout in a diagonal motion, wipe over the grouted surface until the area streaks and then turn the sponge over and wipe the surface until the tile streaks again.
Step 7 – Rinse and Repeat
Rinse tile sponge and repeat the previous step until all the grout residue is removed and tile is completely clean of grout haze.
Note: Allow grout to cure for 12 to 24 hours before walking on the joints to ensure the grout has completely dried.
Step 8 – Buff Excess Grout
Once the grout has dried you will need to buff off any excess grout with a clean dry white rag, shake out the rag if you are doing a big area. “Don’t use a rag that has any dyes that could run”.
Step 9 – Use Grout Sealer
If you have put all the hard work into rejuvenating your grout it is suggested that you use a suitable grout sealer so all your hard work will last for years to come.
Visit your local Tile Wizards store where one of the friendly staff can advise on the best product to use, and you can also browse through our range of tile products in-store.
You can find Tile Wizards stores around Brisbane (Springwood), Adelaide (Lonsdale, Para Hills West, Richmond), Sunshine Coast (Bokarina) and in Coffs Harbour.
YOU MIGHT ALSO LIKE TO READ:
White or Coloured Grout?
Tile grout plays an important role in the aesthetics of your space. It draws the eyes to your entire tiling pattern and not just the individual tile. Learn how to choose the right grout for your tiles with these tips from Tile Wizards…READ MORE


